Post
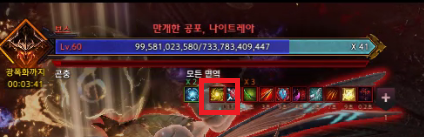
(Data Warning) Act 3 Gate 2 Special Pattern and Gimmick Guide (Hard)
I tried to pay attention to the details, but there may be some shortcomings.
If there is any incorrect information, please report it in the comments and I will check and correct it.
It is organized sequentially from phase 1 to phase 3.
Pattern organization is in the order of telegraph - execution - completion.
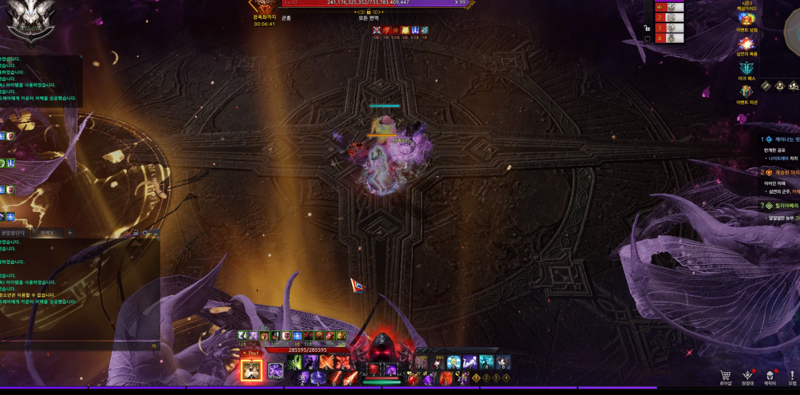
1. Elber/Yoho Phase Special Pattern: Tank the Wave
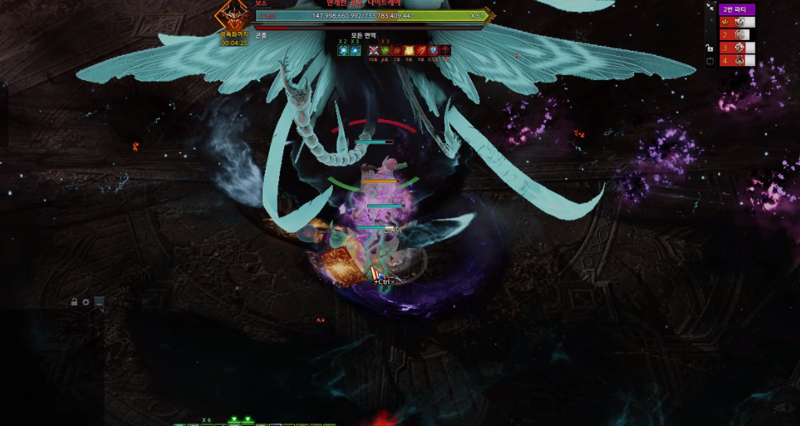
This is the pattern telegraph.
The boss briefly roars, flies into the sky, and then appears in the center.
You have about 5 seconds of damage time, so deal as much damage as possible.
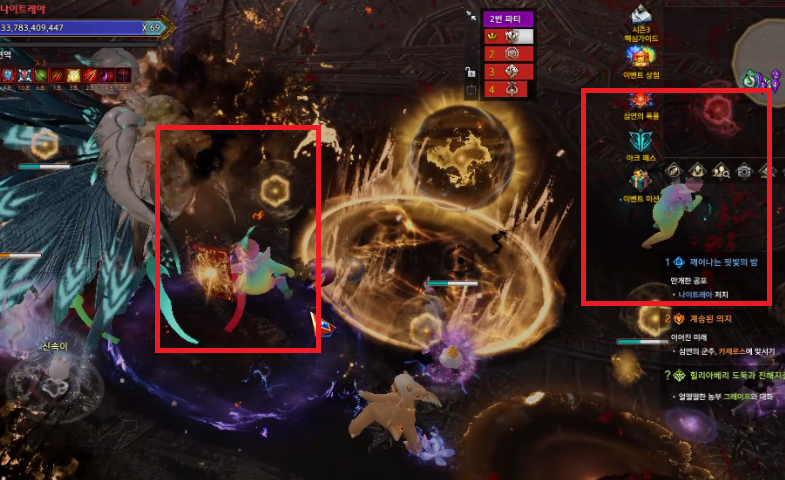
While dealing damage to the boss in the center, stick to the wall when the outer area explodes.
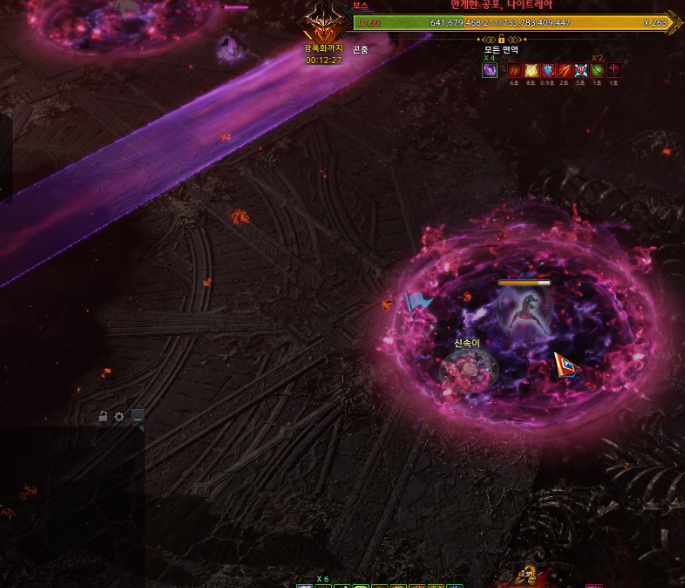
After that, if you touch the center, you will be inflicted with a status ailment, and a black mist will appear, dealing a lot of damage.
4 people get circle patterns, and 4 people get aggro line patterns.
People with circle patterns should stay as far away from the boss as possible, waiting at the end of the wall.
People with aggro line patterns should dodge the pattern once and then stick to the person with the circle pattern to mark them 1:1.
After dodging the aggro pattern once, the person with the circle pattern will be forcibly moved to the center.
A wave spreads out from the boss. The person who had the circle pattern gets a 'movement speed increase' buff when hit by the wave,
and the person who didn't gets a 'slow' debuff when hit by the wave.
The person who can move must tank the wave in front so that the person with the circle pattern can survive.
The person tanking should tank the wave '3 times' and then move to dodge the aggro pattern once more,
then stick to their partner again and tank the wave 2 more times.
After that, the boss uses a finishing attack, but the forced movement is released just before being hit, so spam movement skills to avoid it.
The person being forcibly moved in this pattern is safe even if they get hit by the wave once.
Summary
Dodge line pattern -> Tank wave 3 times -> Dodge line pattern -> Tank wave 2 times -> Everyone dodge the last red pattern
If you move immediately after tanking the wave 3 times, it will be easier to dodge the second line pattern.
2. Golden Orb, Silver Orb
This is the second special pattern that only appears in the Elber phase.
You must check the color under the boss's feet that is shown at the beginning of the pattern because that is the direction you need to grab at the end.
After showing the color under its feet, the boss creates 2 orbs of each color 3 times, for a total of 6 orbs.
They are created in a large cross, small cross, and X shape.
After that, a golden zone appears at 7 o'clock and a silver zone appears at 5 o'clock,
and you are safe if you enter the zone of the same color as the orb that was created just before.
The boss will stab in the same spot as the color it showed at the beginning, and you will be grabbed if hit.
At least '1 person' must be grabbed to trigger a stagger. If no one is grabbed, a wide-area attack will come.
If you successfully stagger the boss, the pattern is completed.
An important tip is that you don't need to keep waiting in the 7 o'clock and 5 o'clock zones. Like in the GIF, you can move towards the boss immediately after seeing the zones being created and deal damage without damage reduction.
In other words, it's a free damage pattern.
The thing to be careful about when moving towards the boss is that there is a wall in the middle, like in Kayangel NM G4 280 lines, so you need to jump over it with spacebar.
Our party cleared the pattern like this:
The last golden and silver safe zone locations are fixed at 7 o'clock and 5 o'clock, and the locations where the orbs are created just before are also fixed.
We assign 1st party to gold and 2nd party to silver according to the 1left2right rule.
We decide the order of eating the orbs in this way, and eat the orbs in order.
(Don't move to the location of the 4th orb, but naturally eat the orbs that are flying towards 7 o'clock and 5 o'clock).
After that, when the 7 o'clock and 5 o'clock safe zones are created, each party's supports use all their buffs and get grabbed, and the DPS move towards the boss and deal maximum damage.
There is no need to compete for orbs while watching each other, and the pattern is cleared naturally.
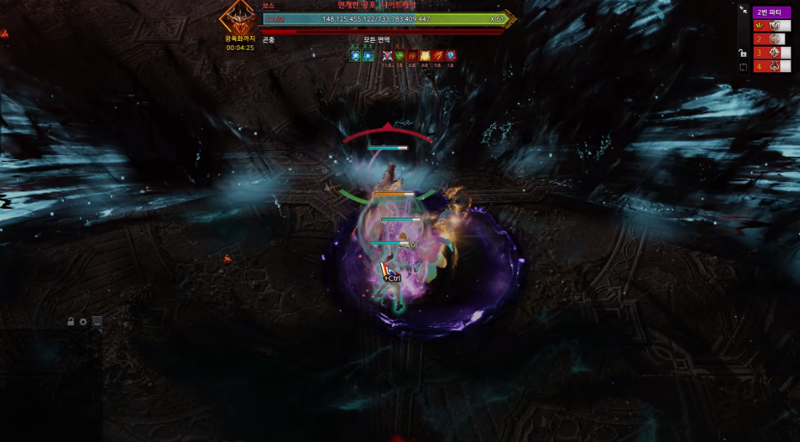
3. Elber / Yoho Full Gauge

This is the pattern that is performed when the gauge is full in the Elber / Yoho phase.
The boss disappears and reappears in the center and roars.
If you fail the star catch, you will die from the outer damage.
After the star catch, the boss crosses the center and grabs the user who is hit and then reappears.
It is recommended that '1 person' be grabbed in this pattern.
After the above pattern, the boss uses a stagger pattern in the center.
The stagger value is generous, so you can stagger it easily.
The point to be careful about is that the boss fires a breath, and if you are too close to the boss's body, you will be hit by the breath and gain parasite stacks.
Maintain a proper distance while staggering.
If no one is grabbed, the stagger time is very short, and if you fail the stagger, a wipe-level wide-area attack will come.
If you succeed in staggering, the full gauge is over.
4. 235 Lines Gimmick
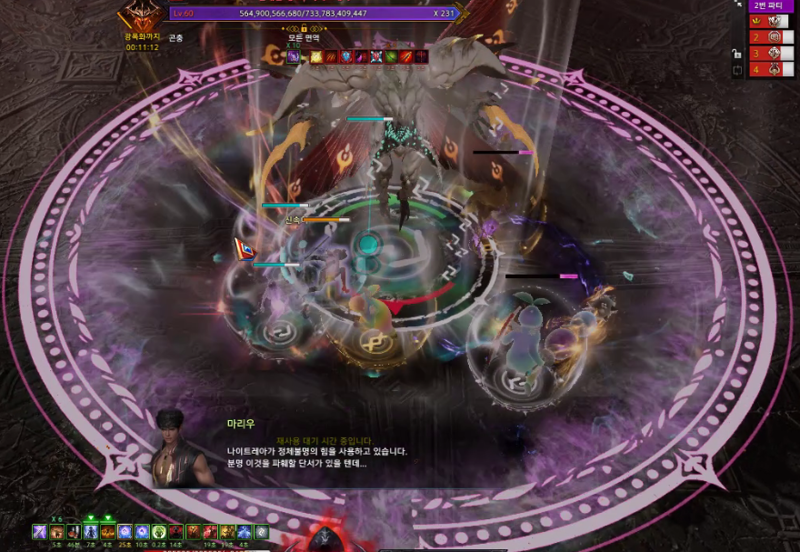
When the boss enters 235 lines, the gimmick proceeds with Mariu's dialogue.
At this time, silver shields and gold shields are given in a 4/4 split.
Check the color under the boss's feet and your own shield color, and if they are the same color, you can survive the subsequent patterns without acquiring special buffs.
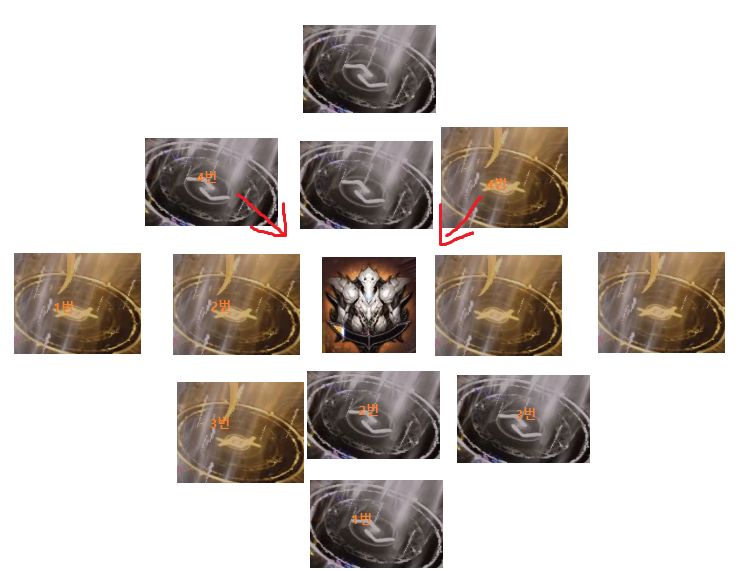
The boss shows a total of 4 intelligence patterns.
You must be in the 'same color' as your shield to be safe.
It usually proceeds as 3/1 2/2.
3/1 = 1st~3rd hit A spot safe 4th hit B spot safe
2/2 = 1st~2nd hit A spot safe 3rd~4th hit B spot safe
If you combine the cases, there seems to be a cheat sheet, but we just watched and proceeded.
After the intelligence pattern, proceed with the boss stagger.
If you succeed in staggering, a total of 4 red orbs will fall on the map, and when the orbs are destroyed, a Ronaun aura-like thing will be created in that spot.
Users with the opposite color to the color under the boss's feet must acquire this aura to have the buff to survive when throwing the last Spirit Bomb.
If you are hit by the intelligence pattern while having the buff, the buff will disappear.
After the stagger, the boss turns its head following the aggro holder and sucks them in.
Just Guard is possible, and if you fail, you will be eaten by the boss and the buff will disappear.
There is no need to Just Guard, you can fix the direction and then dodge with spacebar or movement skills when it sucks you in.
If you repeat intelligence-stagger-Just Guard a total of 4 times, the pattern ends with the boss throwing a Spirit Bomb at the end.
When the boss raises its hands and gathers the Spirit Bomb, use Nineveh to deal damage and get the gauge payback.
During this pattern, only 10% damage is dealt, so there is no need to deal maximum damage, just put in some filler damage if you are bored.
You can take down about 3~4 lines if you hit it.
If you are below 220 lines immediately after the pattern ends, start the Yoho eating show immediately.
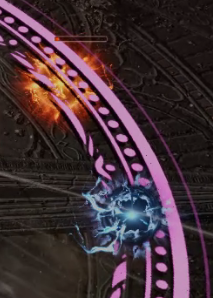
5. Yoho Whirlwind Pattern
This is a timed special pattern.
The boss flaps its wings violently and disappears, and whirlwinds appear on the map.
If you are hit by this whirlwind, you will transform into a fox.
Dodge the boss's attacks here and there.
I don't know if it's a bug, but sometimes you get hit and transformed when you can't see anything.
Be careful of the blue zones that fall on the map, they explode multiple times, it hurts like hell if you touch them.
If you dodge the boss's attacks here and there, the boss will appear and zones will spread around the outer area.
Spread out and dodge well, and then stick to the boss at the end to finish it.
There are no special gimmicks in the Yoho phase, just dodge the patterns and deal damage until 105 lines.
6. 105 Lines Gimmick
When the boss's HP enters 105 lines, the gimmick starts.
The inside 4 people are separated into a black and white screen, and the outside 4 people are separated into a color screen.
Internal personnel cannot see any colors, so they must distinguish subsequent pattern clears by motion rather than color.
When the pattern starts, a total of 6 boss clones are created on the map.
Position yourself in the center so you can see them all at once.
2 of the 4 'external' personnel can see 2 golden zones each.
Ping the spots where you see the golden zones.
If 2 people ping the zones they each see, there will be a clone where the pings 'overlap'.
That clone is the real one, and the fake ones will use a line of thorns.
Gather in the center and wait, then move to the real location to dodge the thorns and perform Just Guard or Counter.
If successful, you will be granted a stagger damage increase buff.
Internal personnel cannot see colors because the screen is black and white, so you must check with Just Guard / Counter motions.
The outside and inside may perform the same pattern, or they may perform different patterns.
ex) External Counter Internal Counter / External Just Guard Internal Counter / External Counter Internal Just Guard
The real/fake Counter Just Guard is repeated a total of 2 times.
If you perform Internal/External Counter/Just Guard 2 times, the boss will appear in the center and proceed with stagger.
Stagger it to finish it. As of 1.24, even if you deal damage below 105 lines, it will recover, so you only need to stagger it and don't need to deal damage.
After this gimmick ends, a cutscene will come out, and after the cutscene ends, you will enter the Belga phase.
When entering the Belga phase, the boss's gauge will change a bit.
It starts at half, and then slowly fills to the right over time, and fills a lot when hit by certain patterns.

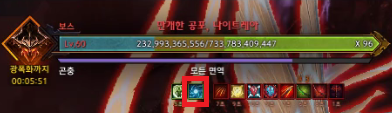
If the gauge goes past the right side and is blue, the boss will gain a 'strengthened' buff.
The boss's attack power increases.
The strengthened buff continues to increase over time.

If you successfully perform the pizza pattern, the boss's gauge will decrease significantly.
If the boss's gauge decreases and goes all the way to the left, the boss will be 'weakened'.
Grants a 10% damage taken increase debuff per stack.
If you manage the gauge well, the debuff stacks will continue to increase over time.
You can also decrease the gauge by stepping on and acquiring the 'Light Authority' that falls during some patterns.
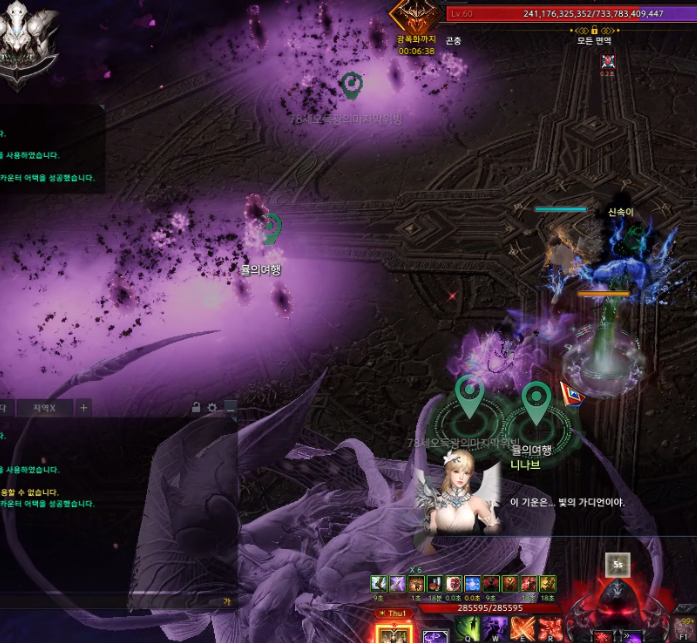
7. Sacrifice Pattern
This is a special pattern in the Belga phase.
This is the sacrifice pattern that many people have seen.
*Shares the counter pattern and internal cooldown '1 minute' while scattering authority and disappearing and appearing.
Fires orbs at random locations around the boss, so be careful as you will fall down if hit.

When the sacrifice pattern starts, check the color above your head.
You don't need the yellow color, you need to check the red and black colors.
Red is the 'boss's head aggro'.
You must fix the head to the orb location to perform the sacrifice pattern.
(Think of (old) Prokel gathering external orbs and hitting them with a laser).
Black is the 'sacrifice'.
In the existing Belga pattern, the color above your head changes just before the boss eats it, but the Nightrea sacrifice is fixed to the first color.
If you have black above your head after the pattern starts, go to the orb location and lie down immediately.
People with yellow should deal maximum damage to the boss while being careful of the zones.
It doesn't matter which location you grab for the red mark.
It's okay to do boss-orb-red
It's okay to do boss-red-orb
It is recommended to stick to the boss's head and deal damage.
The boss doesn't push the user while going, it penetrates and moves, so you won't be eaten together.
If you grab aggro well and each person performs their role, the pattern will be cleared successfully and the boss will be in a groggy state for a while.
It's a maximum damage time from the start to the end of the pattern, just check the red and black marks well and deal damage for the rest.
8. Pizza Pattern
*01.24 14:18 Modified
It's not a full gauge pattern, it's a timed pattern.
The pizza pattern is entered every '1 minute 30 seconds' based on the first encounter in the Belga phase.
If a long pattern comes out before entering the pizza, it may be pushed back.
EX) Based on entering the Belga phase at 6 minutes, the pizza pattern is cast at 4 minutes 30 seconds / 3 minutes 0 seconds / 1 minute 30 seconds.
Based on entering the Belga phase at 6 minutes, the pizza comes out at 4 minutes 30 seconds, and the pizza should come out at 3 minutes, but if the boss casts a long pattern at 3 minutes 05 seconds and is pushed back, the next pizza will be cast at 1 minute.
It's a bit complicated, but it's easy to understand once you understand it.
Pattern start.
The boss appears in the center and shows 3 'black pizzas',
and then one purple smoke spreads out with clockwise / counterclockwise whirlwinds.
The role of the black pizza zone is 'reverse direction'.
The role of the purple smoke is 'erase black pizza'.
The start of the pizza pattern is fixed at 6 o'clock and proceeds '5 times'.
Black pizza zones appeared at 1 o'clock, 3 o'clock, and 9 o'clock,
and purple smoke erased the black pizza in the 3 o'clock direction.
The remaining black pizzas are '2' at 1 o'clock and 9 o'clock.
The whirlwind turned counterclockwise, so we proceed counterclockwise from 6 o'clock.
Here, there is a black pizza at '1 o'clock', so if you touch 1 o'clock, the direction will be 'reversed'.
If you combine the information, the safe zone of the pizza pattern is 6 o'clock -> 5 o'clock -> 3 o'clock (reverse deleted) -> 1 o'clock (reverse) -> 3 o'clock.
Quick moment of judgment is required.
If you succeed in clearing the pizza pattern, the boss's gauge will decrease 'greatly'.
The gauge decreases by about 10% per person who succeeds in the pattern.
It doesn't matter if you survive or not, it's the 'number of people who succeed'.
If 1 person survives and 1 person succeeds, it doesn't all decrease, only 10% decreases.
If 8 people survive and 4 people use Awakening and 4 people succeed, it decreases by about 40%.
It is recommended that everyone focus and rotate together for the first pizza.
If the party's gear is good and there is no need to weaken the boss, it doesn't matter if you use Awakening from the beginning,
but if the damage is barely enough to avoid enrage, it is 'essential' to perform it properly to weaken the boss.
Below is an additional example of clearing the pizza pattern.
5 o'clock, 7 o'clock, 9 o'clock black pizza
7 o'clock purple smoke deletes black pizza
The remaining reverse locations are 5 o'clock, 9 o'clock
The whirlwind is counterclockwise
6 o'clock -> 5 o'clock (reverse) -> 6 o'clock -> 7 o'clock (reverse deleted) -> 9 o'clock (end)
Black pizza is '6 o'clock', 7 o'clock, 12 o'clock
7 o'clock purple smoke deletes black pizza
The remaining reverse locations are '6 o'clock', 12 o'clock
The whirlwind is 'counterclockwise'
It starts at 6 o'clock, but since there is a black pizza from the start, 'immediately reverse' and proceed clockwise
6 o'clock (reverse) -> 7 o'clock (reverse deleted) -> 9 o'clock -> 11 o'clock -> 12 o'clock (end)
I will skip the relay meteor pattern because there are too many accidents, so I just skipped it with Hidden Mystic.
I don't know it well either.
If there is any incorrect information or missing information, please report it in the comments and I will check and correct it.
Thank you
Lost Ark Inven Tips and Know-how태양물고기
2025-01-24