Post
Warframe: The Complete Melee Arcanes Guide
This video looks at all the Melee Arcanes in Warframe, helping you decide what each one does, where to get it, and most importantly, when to use it. It provides an in-depth analysis of each of the 11 Melee Arcanes, allowing players to make informed decisions.
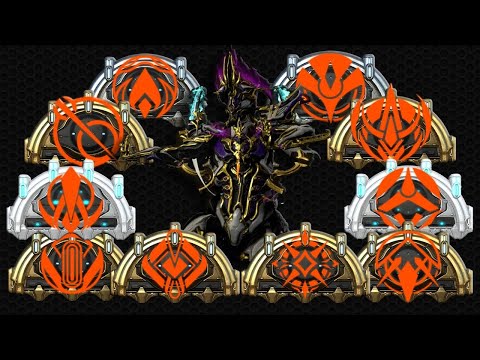
1. ⚔️ Melee Arcane Guide Intro: The Best and Worst
- ✅ This guide covers all Melee Arcanes in Warframe.
- ✅ Explains what each Arcane does and where to acquire it.
- ✅ Aims to help players decide when to use each Arcane.
- ⚠️ Generally doesn't focus on which Arcanes are the best or worst, but for melee weapons, there is a strongest choice that outshines the others in 90%+ of situations.
00:01 - 00:34
1. ⚔️ Melee Arcane Guide Intro: The Best and Worst
- ✅ This guide covers all Melee Arcanes in Warframe.
- ✅ Explains what each Arcane does and where to acquire it.
- ✅ Aims to help players decide when to use each Arcane.
- ⚠️ Generally doesn't focus on which Arcanes are the best or worst, but for melee weapons, there is a strongest choice that outshines the others in 90%+ of situations.
00:35 - 03:21
2. ⚡ Melee Influence: Acquisition, Effect, and Usage
- ✅ Melee Influence can be obtained from the Fragmented Boss on Deimos, Whispers in the Walls Albrecht's Lab missions, and the Grzzl in non-Disruption missions.
- ✅ It can also be purchased with standing from Bird 3 in Sanctum Anatomica.
- ✅ Triggers on applying electricity with a melee weapon with a 20% chance.
- ✅ Lasts for up to 18 seconds, spreading all melee elemental status effects to all enemies within 20m.
- ✅ Not suitable for weapons with low status chance, nor is it optimal for slow, heavy attack builds.
- ✅ It's an AoE Arcane, so it won't work on a single target.
- ✅ Suitable for setups that scale high status and status damage.
- ✅ Weapons like Dual Ichor can use gas, blast, and electricity to make the most powerful setup.
| Effect | Description |
|---|---|
| Status Spread | Replicates elemental status effects like electricity, blast, and gas to all enemies within a 20m radius. |
| Single Target Damage | Can add single target damage by using weapons that proc slash status effects. |
03:22 - 05:21
3. 💥 Melee Affliction: Acquisition, Effect, and Usage
- ✅ Melee Affliction can be obtained from Sisters of Parvos summoned from Ascension Elevators.
- ✅ Can also be purchased from Ordis in the Drifter Camp for 10 Vestigial Mota Pops.
- ✅ Triggers when an enemy is knocked down, thrown, or lifted by a melee attack.
- ✅ Adds 6 additional stacks to all status effects on the enemy.
- ✅ Doesn't work on enemies immune to crowd control.
- ✅ Works well with heavy slam setups.
- ✅ Best suited for weapons with forced slash procs and heavy attacks that have knockdown, ragdoll, or lift.
- ✅ Slam builds are slow and only proc one or two status effects per heavy slam, so Affliction enables these builds.
- ✅ Pairs particularly well with blast on stances that have lift, knockdown, or throw at the end of the combo.
05:22 - 06:52
4. 🎯 Melee Animosity: Acquisition, Effect, and Usage
- ✅ Melee Animosity can be obtained from the Fragmented Boss on Deimos, Whispers in the Walls Albrecht's Lab missions, and the Grzzl in non-Disruption missions.
- ✅ Can also be purchased with standing from Bird in Sanctum Anatomica.
- ✅ Triggers on hitting an enemy with a melee attack, increasing critical chance by up to 42% on the next heavy attack.
- ✅ Stacks up to 10 times.
- ✅ Additive with melee critical mods like True Steel and Blood Rush.
- ✅ Used almost exclusively for critical heavy Tenai builds where you can't run anything else.
06:53 - 09:15
5. 🎼 Melee Crescendo: Acquisition, Effect, and Usage
- ✅ Melee Crescendo can be obtained from Netra Cells and Deep Archimedea rotations A, B, and C.
- ✅ Triggers on finisher kills, providing up to a 6x initial combo for the rest of the mission.
- ✅ Can always maintain a 12x combo if you perform enough finishers.
- ✅ With a 12x initial combo, it takes a long time for the combo to regenerate.
- ✅ Initial combo regenerates at a rate of 40 points per second.
- ✅ A 12x combo is 220 hits, so it takes 5.5 seconds to fully regenerate.
- ✅ Only suitable for setups that favor a 12x combo.
- ✅ Good if you can't generate combo, don't want to generate combo from the weapon itself, and don't need to heavy attack often.
- ✅ Works very well with the Secondary Outburst Arcane.
- ✅ Used as a single target backup Arcane.
- ✅ Suitable for setups that group enemies first.
- ✅ Good for weapons with unique heavy attack mechanics that don't need to heavy attack often, like the Zenistar.
09:16 - 11:08
6. 🩸 Melee Doughty: Acquisition, Effect, and Usage
- ✅ Melee Doughty can be purchased from Elenore.
- ✅ Can be received as a reward from the 1999 Calendar.
- ✅ Can be obtained from the Trot Save in Hularia missions and the Skjaldra Cache in Hularia Exterminate missions.
- ✅ Can be obtained from the HO9 Pervan Tank.
- ✅ Can be received as a reward from the Hularia Faceoff mission.
- ✅ Can be obtained from the Skjaldra Screamer in Stage Defense.
- ✅ Provides up to 1x critical multiplier for every 10% chance to proc puncture on a melee weapon.
- ✅ Very niche Arcane that can primarily only be used on critical heavy weapons that deal puncture damage and don't want to use elemental damage.
- ✅ Gets worse if you use buffs like Nourish that add elemental damage to your weapon.
- ✅ Requires something special like the Ceramic Dagger.
- ✅ When you activate Incarnon, your heavy attack throws a dagger that deals heat damage.
- ✅ Can easily get 1,000%+ critical damage increase from Doughty, but you're leveraging it with the heat daggers that come out of the Incarnon heavy attack.
11:09 - 13:11
7. 👯 Melee Duplicate: Acquisition, Effect, and Usage
- ✅ Melee Duplicate is a previous legendary Arcane that can be rewarded from Netra Cells and Deep Archimedea rotations A, B, and C.
- ✅ Triggers on a base critical hit (yellow critical), providing up to 100% chance to hit twice.
- ✅ This Arcane is good on weapons that have mediocre criticals.
- ✅ If set up correctly, this Arcane essentially doubles your damage.
- ✅ The second hit is its own hit.
- ✅ Rolls its own chance.
- ✅ If the original hit forces a status proc, the second hit will do the same.
- ✅ Generally better and more used on weapons with high status chance and desirable forced procs, like the heavy attack of the Glaive Prime.
- ✅ Puncture can make it easier to critical enemies, so you have to be careful.
- ✅ Duplicate hits reroll the chance, so you can get an orange critical.
- ✅ Depending on the weapon's modded critical multiplier, it's becoming more and more valuable to have some duplicated hits orange critical instead of not duplicating every single hit.
- ✅ There's even a formula you can use to calculate the ideal critical chance with a rank 5 Duplicate.
13:12 - 14:30
8. ☢️ Melee Exposure: Acquisition, Effect, and Usage
- ✅ Melee Exposure is a somewhat common Arcane that can be rewarded by killing the Fragmented Boss on Deimos.
- ✅ Can be obtained from Whispers in the Walls Albrecht's Lab missions or the Grzzl in Node Disruption missions.
- ✅ Or can be purchased with standing from Bird 3 in Sanctum Manatomica.
- ✅ Triggers on ability cast, providing a 60% corrosive damage bonus to your melee weapon for 25 seconds.
- ✅ Can stack up to 240%.
- ✅ Very generic, so it works on almost any melee weapon you use.
- ✅ Sustainable on every Warframe.
- ✅ Best suited for setups where you're short on weapon space and can't fit enough elemental damage.
- ✅ Generally fantastic for boss fights because you want to do a lot of damage to the boss.
- ✅ It's like Melee Merciless.
- ✅ Generally not the best, but it works on almost everything.
- ✅ Works like a fusion buff.
- ✅ If you have electricity or toxin on your weapon, it will leave it alone and not combine it.
14:31 - 15:37
9. 🛡️ Melee Fortification: Acquisition, Effect, and Usage
- ✅ Melee Fortification is a strictly defensive Arcane that can be obtained from the Fragmented Boss on Deimos.
- ✅ Can be obtained from Whispers in the Walls Albrecht's Lab missions or the Grzzl in non-Disruption missions.
- ✅ Or can be purchased with standing from Bird 3 in Santomica.
- ✅ Triggers on melee kill, providing up to 210 armor for 10 seconds.
- ✅ Basically has no cap.
- ✅ Can buff up to 255 times.
- ✅ Getting this much flat armor per kill is non-negligible.
- ✅ Can add a lot of armor, especially on squishy frames that don't have a lot of armor to begin with.
- ✅ Unfortunately, in most cases, Melee Fortification is the ultimate backup Arcane.
- ✅ If nothing else works, you can throw on Fortification and get armor.
15:38 - 17:32
10. 💥 Melee Retaliation: Acquisition, Effect, and Usage
- ✅ Melee Retaliation can again be obtained from the Fragmented Boss on Deimos.
- ✅ Can be obtained from Whispers in the Walls Albrecht's Lab and the Grzzl in non-Disruption missions.
- ✅ Can be purchased with standing from Bird 3 in Sanctum Anatomica.
- ✅ Always active, providing 30% generic melee damage per 200 current shields, up to 420% bonus melee damage.
- ✅ Works on overshields as well, but only provides half the bonus melee damage.
- ✅ The bonus it provides is generic melee damage, so it competes with mods like Pressure Point and Condition Overload.
- ✅ If you're using this Arcane, it's recommended not to use Pressure Point or Condition Overload to avoid doubling up on the same multiplier.
- ✅ Retaliation saves a mod slot and is good for builds that are short on mod space.
- ✅ To get the most out of Retaliation, you need at least 2,800 shields or 2,200 shields and a full overshield on your Warframe.
- ✅ Needs to be able to be maintained because it's based on current shields.
- ✅ Has become more usable with the addition of Primed Redirection.
- ✅ Saves a mod slot and the amount of damage it provides is very high, but melee weapons rarely need more power than what you get from Primed Pressure Point or Condition Overload, so it's rarely used.
- ✅ There are niche weapons where it can shine, like the RT Dark Dagger.
- ✅ Becomes a niche Arcane because the competition is so good.
- ✅ Run on high shield frames when you need to save a mod slot on your melee weapon.
17:33 - 19:01
11. 🌀 Melee Vortex: Acquisition, Effect, and Usage
- ✅ Melee Vortex can again be obtained from the Fragmented Boss on Deimos.
- ✅ Can be obtained from Albrecht's Lab or the Grzzl in non-Disruption missions.
- ✅ Can be purchased with standing from Bird 3 in Sanctum Anatomica, but can also be obtained from Captain Vor in the mission to story on Mercury in Steel Path.
- ✅ Triggers with up to a 45% chance when killing an enemy affected by magnetic proc.
- ✅ Creates a vortex that pulls in all enemies within an 18m radius.
- ✅ The best part about Vortex is that it doesn't care where the magnetic proc came from.
- ✅ You don't need to mod your melee weapon for magnetic, whether it's from a pet, another weapon, or a frame.
- ✅ One of the most used Arcanes besides Influence.
- ✅ Absolutely fantastic for AoE heavy melee setups that rely on gas, electricity, blast, or anything that causes a big explosion or has a wide range and good follow-through mechanic.
- ✅ Almost mandatory for horde mode style missions.
- ✅ Good if you're not playing a frame that has good grouping capabilities.
- ✅ Works on light attack stack builds, heavy attack builds, Tenai builds, and even slam builds.
- ✅ One of the Arcanes that can be used for pure utility.
- ✅ Favorite on Tenny builds.
- ✅ Doesn't add direct power to your melee weapon, but one of the more useful Arcanes you can run.