Post
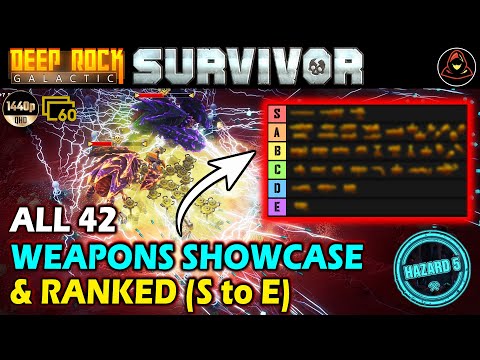
Deep Rock Galactic: Survivor - All Weapon Tier List (Tier S to E, Based on Haz 5)
Testing all weapons in Deep Rock Galactic: Survivor on Haz 5 difficulty, ranking them from S-tier to E-tier. Detailed analysis of each weapon's build, overclock, and usage strategy to help players use resources efficiently and build optimal builds.
1. 🥇 S-Tier Weapon Analysis: M1000, Thunderhead, Krakatoa
- ✅ M1000 Classic: The best single-target damage weapon. Focus on damage and reload speed to build for sustained attacks. Utilize clip size and 'Thick Bullets' overclocks.
- ✅ Thunderhead Autocannon: Focus on penetration, damage, reload speed, and fire rate to build. Prioritize penetration overclocks and maximize screen clearing ability with the 'Tightly Wound Springs' overclock.
- ✅ Krakatoa Sentinel: The best defensive weapon. Focus on range, damage, and reload speed to continuously deploy turrets. Utilize turret track, beam, and turret mining overclocks to cover the entire map.
00:06 - 00:43
1. 🥇 S-Tier Weapon Analysis: M1000, Thunderhead, Krakatoa
- ✅ M1000 Classic: The best single-target damage weapon. Focus on damage and reload speed to build for sustained attacks. Utilize clip size and 'Thick Bullets' overclocks.
- ✅ Thunderhead Autocannon: Focus on penetration, damage, reload speed, and fire rate to build. Prioritize penetration overclocks and maximize screen clearing ability with the 'Tightly Wound Springs' overclock.
- ✅ Krakatoa Sentinel: The best defensive weapon. Focus on range, damage, and reload speed to continuously deploy turrets. Utilize turret track, beam, and turret mining overclocks to cover the entire map.
02:17 - 07:04
2. 🥈 A-Tier Weapon Analysis: DRA 25, Jury Rig, Thor Bug Taser, and more
- ✅ DRA 25 Plasma Carbine: Easily clears monster hordes. Focus on penetration, damage, reload speed, and fire rate. Freeze enemies with the 'Chilled Plasma' overclock, and enhance firepower with 'Big Magazine' and 'Son Off' overclocks.
- ✅ Jury Rig Boomstick: Secures survival space with powerful knockback. Focus on penetration, damage, reload speed, and fire rate. Add frost damage with the 'Refrigerated Gunpowder' overclock, and maximize firepower with 'Big Magazine' and 'Mini Shells' overclocks.
- ✅ Thor Bug Taser: Focus on beam, range, damage, and reload speed. Add beams with the 'More Beams' overclock, and unlock potential with the 'Unlimited Power' overclock.
- ✅ Warthog Auto 210: Focus on damage and fire rate. Reload speed can be skipped. Utilize 'Plasma Damage' and 'Akimbo' overclocks to fire in two directions and attack multiple enemies with plasma bounces.
- ✅ Hurricane Guided Rocket System: Focus on reload speed and damage. 'Incendiary Rounds' and 'Extra Rockets' overclocks are essential, and enhance firepower with the 'Additional Rocket Drum' overclock.
- ✅ Impact Axe: Focus on damage and reload speed. Gain elemental damage bonuses with 'Corrosion Coating' or 'Diesel Infiltration' overclocks, and deliver explosive damage with the 'Giant Twin Blades' overclock.
- ✅ CR SPR Flamethrower: Focus on range, damage, effectiveness, and reload speed. Double damage with 'More Beams' and 'Overheat' overclocks, and maximize damage saturation by adding beams with the 'Even More Beams' overclock.
- ✅ Corrosive Sludge Pump: Focus on range, damage, effectiveness, and reload speed. Quickly accumulate acid damage by utilizing 'More Beams', 'Bigger Tank', and 'Even More Beams' overclocks.
- ✅ Colette Wave Cooker: Focus on range, damage, effectiveness, and reload speed. Utilize 'Crowd Cooker' and 'Nano Pulse' overclocks, and choose 'Centralized Reflector' if you have other frost weapons, otherwise choose 'Thermal Oscillator'.
- ✅ Bridge Cutter: Focus on reload speed and damage. Choose 'More Beams' and 'Hot Plasma' or 'Ionized Plasma' overclocks, and enhance firepower with the 'Experimental Cluster Projectiles' overclock.
- ✅ Firefly Hunter Drone & K1 Viper Drone: Focus on damage, effectiveness, and reload speed. 'More Drones' and 'Disposable Tech' overclocks are essential, and increase the number of drones with the 'Even More Drones' overclock. Firefly Hunter can choose the 'Mining Overclock' if mining support is needed.
- ✅ Incendiary, Neurotoxin, High Explosive Grenades: Focus on damage, reload speed, and effectiveness. Maximize kinetic energy damage with 'Cluster Grenades' and 'Nailed It!' overclocks.
- ✅ Plasma Burster: Focus on reload speed and damage. Deal frost effect and multi-target damage with 'Gold Plasma' and 'More Bounces' overclocks.
07:05 - 11:19
3. 🥉 B-Tier Weapon Analysis: Cryo Grenade, Cryo Cannon, Seismic Repulsor, and more
- ✅ Cryo Grenade: Deals frost damage over a wide area, freezing enemies and destroying terrain. Focus on reload speed, damage, and effectiveness. Utilize 'Cluster Grenades', 'True TNT', and 'Gravity Core' overclocks.
- ✅ Cryo Cannon: Deals frost damage, freezing enemies. Focus on range, effectiveness, reload speed, and damage. Accumulate frost burn damage with 5 beams by utilizing 'More Beams', 'Frost Burn', and 'Even More Beams' overclocks.
- ✅ Seismic Repulsor: Prioritize reload speed and increase damage. Secure movement speed and reload speed with 'Tank Truck' and 'Disposable Tech' overclocks, and increase charge count with the 'Extra Capacity' overclock.
- ✅ Arms Core Coil Gun: Focus on range, reload speed, and damage. Enhance terrain destruction ability by utilizing 'Coil Gun Mining Damage', 'More Beams', and 'Even More Beams' overclocks. Remains in B-tier due to low damage.
- ✅ LMG Gun Platform: Focus on reload speed, fire rate, and damage. Utilize 'Plasma Coating' and 'Mining Guidance' overclocks, and enhance firepower with the 'LMG Overload' overclock.
- ✅ Deepcore PGL: Focus on damage, reload speed, and fire rate. Utilize 'Cluster Grenades' and 'Small Explosives' overclocks, and enhance firepower with the 'Akimbo' overclock. Damage is decent, but it belongs in B-tier.
- ✅ Stubby Voltaic SMG: Quickly accumulates electric damage. Focus on damage, reload speed, and effectiveness. The 'MK11' overclock is slightly better than 'EM Discharge'.
- ✅ Voltaike Shock Fence: Good at level 18, and very good at level 25 and above. Focus on reload speed, damage, and lifespan. Utilize 'Disposable Tech', 'Magnetic Alloy', and 'Quick Deployment' overclocks.
- ✅ High Vault Thunderbird: Focus on damage, reload speed, and effectiveness. Utilize 'Behavior Chip Aggro', 'Disposable Tech', and 'More Drones' overclocks, and increase the number of drones with the 'Even More Drones' overclock.
- ✅ Tactical Lead Burster: Focus on reload speed, penetration, and damage. Prioritize 'Cluster Grenades' and 'Penetrating Projectiles' overclocks, and enhance firepower with the 'Lead Blanket Ammo' overclock.
- ✅ Shredder Swarm Grenade: Focus on reload speed and damage. Utilize 'Cluster Grenades' and 'More Drones' overclocks, and choose 'Ice Tape' if you don't have other frost weapons. Enhance firepower with the 'Electrified Splitter' overclock.
11:20 - 13:52
4. Fun but Disappointing C-Tier Weapon Analysis
- ✅ Zukov Nook 17: Focus on penetration damage, fire rate, and reload speed. Utilize 'Bigger Magazine' and 'Refrigerated Gunpowder' overclocks, and fire in 8 directions with the 'Omni Barrel' overclock. Lacks damage, resulting in inconsistent performance on Haz 5.
- ✅ BRT7 Burst Fire Gun: Focus on penetration damage, fire rate, and reload speed. Utilize 'Bigger Magazine' and 'Pan Fried Shot' overclocks, and enhance firepower with the 'Omni Arrow' overclock. Similar to Zukov, it lacks damage.
- ✅ LO one Smart Rifle: Focus on damage, reload speed, and fire rate. Utilize 'Bigger Magazine' and 'Battery Rounds' overclocks, and enhance firepower with the 'Lead Blanket Ammo' overclock.
- ✅ Nishanka Bolt Shark X80: Focus on damage, reload speed, and fire rate. Utilize 'Cryo Bolts' and 'Fire Bolts' overclocks, and fire all bolt types at once with the 'Bolt Volley' overclock. Shows mediocre performance.
- ✅ Shard Defractor: Focus on range, damage, and reload speed. Utilize 'Chilled Plasma', 'More Beams', and 'Even More Beams' overclocks. Looks cool, but the damage is disappointing.
- ✅ Arctic Cryo Guard: Focus on damage and reload speed. Utilize 'Behavior Chip Aggro', 'Disposable Tech', and 'More Drones' overclocks. Nothing impressive.
- ✅ Volulti Stun Sweeper: Focus on reload speed and damage. Utilize 'Looks Like a Magnet' and 'Knuckle Grips' overclocks, and secure mobility with the 'One Handed' overclock. Good for crowd control, but lacks damage.
- ✅ Experimental Plasma Charger: Focus on reload speed and damage. Utilize 'Chilled Plasma', 'Vortex Core', and 'Experimental Cluster Projectiles' overclocks.
13:53 - 14:37
5. ⛔ D-Tier Weapons to Avoid
- ❌ Lead Storm Powered Minigun: A nightmare of a weapon. Only useful when facing bugs head-on, and less useful when kiting. Focus on damage, reload speed, and fire rate. Utilize 'High Caliber Rounds', 'Bigger Magazine', and 'Lead Blanket Ammo' overclocks.
- ❌ Deep Core GK2: A basic weapon that fails scaling tests.
- ❌ Subata 120: Only shoots backwards.
14:38 - 15:05
6. 🗑️ Worst E-Tier Weapon: Bulldog Heavy Revolver
- ❌ Bulldog Heavy Revolver: Targets the closest bug. Should be avoided as you don't want to be close to elite bugs. Performs poorly even with maximum luck.