Post
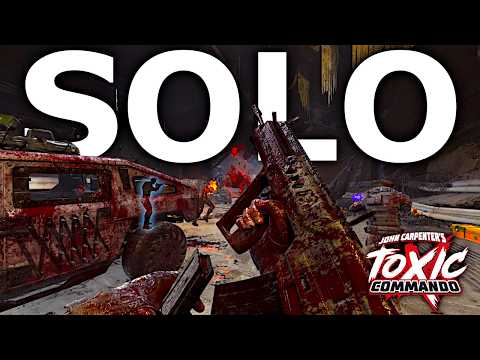
John Carpenter's Toxic Commando: Max Difficulty Solo Play GuideIntroducing a solo playthrough of John Carpenter's Toxic Commando 'The Drop' mission on the highest difficulty. This video details the process of facing massive zombie waves and special enemies, performing various objectives such as defending the elevator, rebooting the system, and activating generators. Check out strategies and tips for overcoming the hardest difficulty even when playing alone.
1. 🎮 Mission Start and Elevator Call Preparation
· The player enters the early part of 'The Drop' mission, advancing while eliminating zombie hordes.
· They discover a resupply area and secure more bullets and explosives.
· The next objective is to use the winch on the pipe and call the elevator via computer.
· They discover a resupply area and secure more bullets and explosives.
· The next objective is to use the winch on the pipe and call the elevator via computer.
00:01 - 01:26
1. 🎮 Mission Start and Elevator Call Preparation
· The player enters the early part of 'The Drop' mission, advancing while eliminating zombie hordes.
· They discover a resupply area and secure more bullets and explosives.
· The next objective is to use the winch on the pipe and call the elevator via computer.
· They discover a resupply area and secure more bullets and explosives.
· The next objective is to use the winch on the pipe and call the elevator via computer.
01:27 - 02:58
2. 🧟 Defending Against Massive Zombie Waves and Waiting for the Elevator
· While waiting for the elevator, a massive zombie wave rushes in, leading to an intense defensive battle.
· The player must defend the elevator area against the relentless onslaught of zombies.
· As soon as the elevator arrives, they quickly board to move to the next area.
· The player must defend the elevator area against the relentless onslaught of zombies.
· As soon as the elevator arrives, they quickly board to move to the next area.
03:00 - 04:18
3. 🎯 Strategy for Dealing with the Special Enemy 'Spitter'
· A special zombie called 'Spitter' appears, and the player shares a strategy to evade its attacks.
· When the Spitter spits, moving right then left to bait its attack makes it easy to dodge.
· Utilizing a defensive character's 'Wall' skill is also a good method.
· When the Spitter spits, moving right then left to bait its attack makes it easy to dodge.
· Utilizing a defensive character's 'Wall' skill is also a good method.
04:35 - 05:09
4. 🚗 Vehicle EMP and Turret Defense
· The player actively uses turrets to suppress incoming enemies.
· They use the vehicle's mounted EMP function to effectively eliminate surrounding zombies.
· It is mentioned that the vehicle's special abilities were a great help in critical situations.
· They use the vehicle's mounted EMP function to effectively eliminate surrounding zombies.
· It is mentioned that the vehicle's special abilities were a great help in critical situations.
05:13 - 07:46
5. 🔒 System Reboot and Card Scan Mission
· With all exits sealed, they must find and scan cards to reboot the system.
· It's mentioned that the middle part of the mission is particularly difficult, befitting the 'Very Hard' difficulty.
· After scanning the second card, they engage in another defensive battle while the system reboot begins.
· It's mentioned that the middle part of the mission is particularly difficult, befitting the 'Very Hard' difficulty.
· After scanning the second card, they engage in another defensive battle while the system reboot begins.
07:52 - 09:06
6. 🔥 Turret and Ghoul Combat
· They activate turrets to attack enemies, and a powerful 'Ghoul' zombie appears, threatening the player.
· The player enters a dome to defend, dodging the Ghoul's charge attacks and counter-attacking.
· The player enters a dome to defend, dodging the Ghoul's charge attacks and counter-attacking.
09:30 - 11:09
7. 🚪 Control Room Restoration and Sludge Removal
· The control room restoration procedure is complete, access is restored, and the garage door opens.
· They use the vehicle's EMP once again to clear the sludge piled in front of the door.
· They use the vehicle's EMP once again to clear the sludge piled in front of the door.
11:12 - 14:09
8. ⚡ Generator Activation and Companion Bot Limitations
· Acquiring new weapons and medical supplies, they must activate all circuit breakers and start the generator to restore power.
· They encounter an enemy called 'Snare,' and the player expresses dissatisfaction with their companion bots' poor performance.
· They activate the generator and deploy decoys, preparing for the final escape.
· They encounter an enemy called 'Snare,' and the player expresses dissatisfaction with their companion bots' poor performance.
· They activate the generator and deploy decoys, preparing for the final escape.
14:10 - 15:08
9. ✅ Final Escape Success and Mission Complete
· They encounter another Snare, but the player, along with their companions, breaks through the final defense and successfully escapes.
· Although somewhat chaotic, they ultimately complete the mission, leaving a message: 'Together, we can destroy anything terrible.'
· Although somewhat chaotic, they ultimately complete the mission, leaving a message: 'Together, we can destroy anything terrible.'