Post
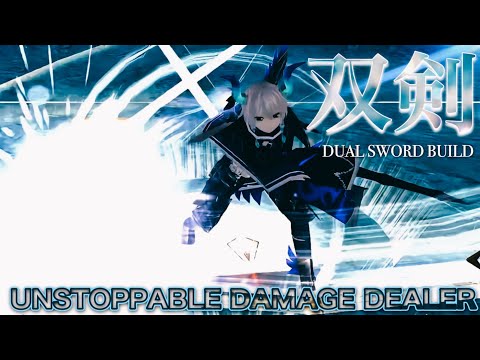
Toram Online: Complete Analysis of the Horizontal Cut Dual Sword Build, from Equipment to CombosIntroducing a new Toram Online dual wield build. This build focuses on the Horizontal Cut skill for powerful damage, and provides detailed information from equipment setup to efficient combo utilization. It aims to deepen your understanding of dual wield gameplay and offers practical tips applicable in real battles.
1. ⚔️ Latest Dual Wield Build Equipment Setup Guide
· This build is a new dual wield build utilizing Horizontal Cut. Following combat footage and skill distribution, we will introduce equipment and combos.
· Equipment is centered around ATK%, Avatar Damage, and Elemental Damage Increase options. Considering the high critical resistance of recent bosses, swords with critical rate are recommended. If critical rate is insufficient, it can be supplemented with skills like Berserk or Camouflage.
· Gear Change is used for stats. It's recommended to choose based on the opponent, such as Guard Corp for high defense enemies and Avoid Dead Corp for high evasion enemies.
· For elemental swords, use swords with the corresponding element. For armor, options like Elemental Damage%, Critical Damage%, and Fixed Critical Damage (including Avatar%) are important. Fixed Critical Damage, in particular, is suitable for the Ace dual wield build as it comes with Avatar% to boost both speed and damage.
· Altar and Kanata are used for Crystas, with Gear Change applied to stats. Shadow Horn is recommended for additional equipment, with Givre 3 and Kinryu for Crystas.
· Special equipment provides 10% stability and 200 MP increase. Kanata and Edward are used for Crystas.
05:34 - 06:59
1. ⚔️ Latest Dual Wield Build Equipment Setup Guide
· This build is a new dual wield build utilizing Horizontal Cut. Following combat footage and skill distribution, we will introduce equipment and combos.
· Equipment is centered around ATK%, Avatar Damage, and Elemental Damage Increase options. Considering the high critical resistance of recent bosses, swords with critical rate are recommended. If critical rate is insufficient, it can be supplemented with skills like Berserk or Camouflage.
· Gear Change is used for stats. It's recommended to choose based on the opponent, such as Guard Corp for high defense enemies and Avoid Dead Corp for high evasion enemies.
· For elemental swords, use swords with the corresponding element. For armor, options like Elemental Damage%, Critical Damage%, and Fixed Critical Damage (including Avatar%) are important. Fixed Critical Damage, in particular, is suitable for the Ace dual wield build as it comes with Avatar% to boost both speed and damage.
· Altar and Kanata are used for Crystas, with Gear Change applied to stats. Shadow Horn is recommended for additional equipment, with Givre 3 and Kinryu for Crystas.
· Special equipment provides 10% stability and 200 MP increase. Kanata and Edward are used for Crystas.
· Equipment is centered around ATK%, Avatar Damage, and Elemental Damage Increase options. Considering the high critical resistance of recent bosses, swords with critical rate are recommended. If critical rate is insufficient, it can be supplemented with skills like Berserk or Camouflage.
· Gear Change is used for stats. It's recommended to choose based on the opponent, such as Guard Corp for high defense enemies and Avoid Dead Corp for high evasion enemies.
· For elemental swords, use swords with the corresponding element. For armor, options like Elemental Damage%, Critical Damage%, and Fixed Critical Damage (including Avatar%) are important. Fixed Critical Damage, in particular, is suitable for the Ace dual wield build as it comes with Avatar% to boost both speed and damage.
· Altar and Kanata are used for Crystas, with Gear Change applied to stats. Shadow Horn is recommended for additional equipment, with Givre 3 and Kinryu for Crystas.
· Special equipment provides 10% stability and 200 MP increase. Kanata and Edward are used for Crystas.
07:59 - 09:39
2. 💎 Dual Wield Build Core Crysta and Equipment Option Analysis
· Potion Change 3 is a firepower-focused Crysta, providing 12% ATK and 10% Avatar.
· Hermit is used for penetration. Altar is a powerful Crysta that simultaneously boosts stability and 11% melee damage.
· Kanata provides 5% physical penetration and 10% melee damage, but reduces attack speed by 250, so it should be used in balance with your own speed.
· Givre 3, equipped on Shadow Horn, increases melee damage by 9%, critical rate by 16%, and MP by 100.
· The recently added White Day Kanata Crysta increases critical rate, physical penetration, and ATK.
· If Kanata is used for special equipment and Etoile is equipped instead of Hermit, critical rate, attack speed by 1100, and action speed by 5% are increased. Recommended for dual wield users lacking speed.
· Fashion equipment has 7% physical penetration and 2% melee options. Depending on the boss's defense, it can be switched to focus on penetration or melee percentage.
09:41 - 12:28
3. ✨ Efficient Dual Wield Combo Strategy Based on Horizontal Cut
· While it's basic to change combos based on the boss, we'll introduce a versatile combo that works on any boss.
· The first combo starts with Air Slide and finishes with a Horizontal Cut enhanced attack. When Horizontal Cut is used at the end of a combo, the MP cost becomes 0, making this combo effectively operate with an MP cost of 100.
· Due to Horizontal Cut's nature, half of the MP consumed is recovered when using the next skill. By repeating this combo, you can continue combos with an effective MP cost of 0.
· If you are within range while Air Slide is activated, the range of Horizontal Cut increases, allowing attacks up to 14m.
· Decoy combos can be configured freely, but you can utilize the introduced combos.
· The third combo is Impact Shining followed by a Horizontal Cut enhanced finisher. Replacing the finisher with Horizontal Cut allows you to gain the MP recovery effect for the next skill, making MP management easier and aiming for increased damage.
· Depending on the situation, combine Twin Buster Blade with a Horizontal Cut enhanced finisher. Impact Shining is used for melee, Twin Buster Blade for mid-range combos with a 7m range, and Twin Buster Blade is effective against multiple enemies.
· Use Reffener to modify Shining for increased damage, or Luna Reaper can also achieve high firepower.
12:29 - 16:00
4. ⚔️ Practical Combat: Zenimer Strategy and Build Operation Tips
· We will demonstrate how to operate the build through a Zenimer strategy. Summon mercenaries to start the battle.
· The core of combat is to primarily utilize Air Slide and Horizontal Cut. Start with a critical enhanced attack and strengthen it with Brave Aura, etc.
· Combos are used in the order of Air Slide followed by Twin Buster Blade, or Impact Shining followed by Horizontal Cut. Thanks to the MP recovery effect, MP management is very easy with this combo, and sustained high DPS can be expected.
· During the process of defeating Zenimer, you can confirm that almost no MP is consumed. This allows for efficient combat while maintaining the fun of dual wield gameplay.
· It's important to consistently use mana, considering the boss's weakness to physical resistance. Since it consists of a series of short combos, flexible responses such as repeatedly using Air Slide instead of Buster Blade or maintaining distance depending on the situation are possible.
· This build offers an enjoyable gameplay experience with various attack patterns and high DPS.