Post
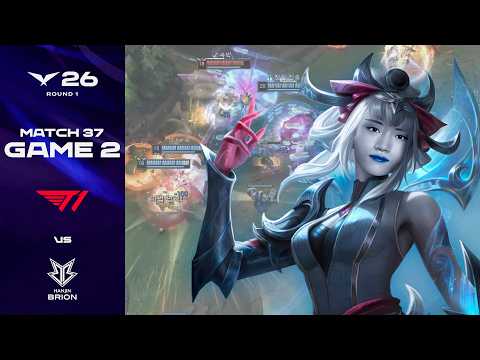
LCK 2026 Spring Split T1 vs BRO Game 2: Keria's Morgana Leads to VictoryHighlights from the second game of the 2026 LCK Spring season between T1 and BRO. T1's support, Keria, showed an impressive Morgana play, and T1 secured the victory thanks to his outstanding performance.
1. 🎮 Game 2 Start and T1's Strategy
· T1 chose a composition with strong crowd control, judging that their frontline was sufficient.
· While a Morgana support can be a difficult pick at the pro level, Keria successfully utilized her.
· They started the second game with a different composition than the first, attempting a new strategy.
· While a Morgana support can be a difficult pick at the pro level, Keria successfully utilized her.
· They started the second game with a different composition than the first, attempting a new strategy.
00:10 - 00:32
1. 🎮 Game 2 Start and T1's Strategy
· T1 chose a composition with strong crowd control, judging that their frontline was sufficient.
· While a Morgana support can be a difficult pick at the pro level, Keria successfully utilized her.
· They started the second game with a different composition than the first, attempting a new strategy.
· While a Morgana support can be a difficult pick at the pro level, Keria successfully utilized her.
· They started the second game with a different composition than the first, attempting a new strategy.
00:33 - 01:19
2. 💥 Early Laning and T1's Pressure
· Morgana took W skill at level 1, starting pressure on the bottom lane.
· BRO had difficulty responding due to the difference in arm length, and T1 gained the initiative from the start.
· Although the jungler's pathing went in the opposite direction, T1 continued to apply pressure based on their bottom lane advantage.
· BRO had difficulty responding due to the difference in arm length, and T1 gained the initiative from the start.
· Although the jungler's pathing went in the opposite direction, T1 continued to apply pressure based on their bottom lane advantage.
01:20 - 02:31
3. ⚔️ T1's Aggressive Moves and Objective Control
· T1 took advantage by eliminating BRO's champions using a full team wipe.
· Even with a disconnected map, T1 tried to gain an advantage through jungle movements.
· T1 attempted a favorable fight when Rumble could join first.
· Even with a disconnected map, T1 tried to gain an advantage through jungle movements.
· T1 attempted a favorable fight when Rumble could join first.
02:32 - 03:57
4. 🎯 T1's Rift Herald Fight and Macro Play
· T1 moved aggressively to secure the Rift Herald and broke through BRO's defense.
· T1 secured the Rift Herald during Morgana's absence, gaining an advantage.
· T1 managed to overcome a situation that could have led to a major disaster if Caitlyn had been caught.
· T1 secured the Rift Herald during Morgana's absence, gaining an advantage.
· T1 managed to overcome a situation that could have led to a major disaster if Caitlyn had been caught.
03:58 - 05:08
5. 🔄 T1's Calm Response Amidst Chaos
· The fight intensified with Annie's arrival, but T1 responded calmly.
· T1 led a favorable fight without Miss Fortune's ultimate.
· T1 maintained composure amidst the chaos, pressuring BRO.
· T1 led a favorable fight without Miss Fortune's ultimate.
· T1 maintained composure amidst the chaos, pressuring BRO.
05:09 - 06:32
6. 🌟 Keria's Morgana Shines Bright
· T1 successfully defended against BRO's encirclement attempt, ensuring their ADC survived.
· Keria's Morgana landed crucial skills at important moments, greatly contributing to T1's victory.
· Although many consider Morgana an overpowered champion, it was noted that few players can utilize her as effectively as Keria.
· Keria's Morgana landed crucial skills at important moments, greatly contributing to T1's victory.
· Although many consider Morgana an overpowered champion, it was noted that few players can utilize her as effectively as Keria.
06:33 - 08:11
7. 💥 T1's Consecutive Successes and Tower Sieges
· T1 broke through BRO's formation, securing consecutive kills.
· Morgana's skill usage and T1's team play were outstanding.
· T1 pushed their advantage by destroying the mid-lane second turret.
· Morgana's skill usage and T1's team play were outstanding.
· T1 pushed their advantage by destroying the mid-lane second turret.
08:12 - 09:24
8. 🐉 T1 Secures Baron and Macro Play
· T1 successfully countered BRO's ambush and secured Baron Nashor.
· Rumble's powerful attacks allowed T1 to safely finish Baron.
· T1 leveraged the Baron buff to lead the game advantageously.
· Rumble's powerful attacks allowed T1 to safely finish Baron.
· T1 leveraged the Baron buff to lead the game advantageously.
09:25 - 10:43
9. ⏳ T1's Standoff and BRO's Counter Attempt
· T1 used the Baron buff to pressure BRO and stall the game.
· BRO conceded the dragon to buy time and aim for Baron.
· T1 used Morgana's skills to block BRO's engages.
· BRO conceded the dragon to buy time and aim for Baron.
· T1 used Morgana's skills to block BRO's engages.
10:44 - 11:45
10. 🚀 T1's Decisive Moment and Victory
· T1 marked the enemy carries at crucial moments, creating opportunities for free damage.
· Keria's exceptional Morgana play played a decisive role in T1's victory.
· T1 secured their second game win through macro play utilizing terrain and teamwork.
· Keria's exceptional Morgana play played a decisive role in T1's victory.
· T1 secured their second game win through macro play utilizing terrain and teamwork.
11:46 - 12:42
11. 🏆 Analysis of T1's Victory Factors
· Keria's Morgana was the key to victory, effectively catching enemy carries.
· T1 demonstrated bold plays and excellent teamwork at critical junctures.
· BRO's lack of effective counter-play against T1's Morgana led to their defeat in the second game.
· T1 demonstrated bold plays and excellent teamwork at critical junctures.
· BRO's lack of effective counter-play against T1's Morgana led to their defeat in the second game.